Date Created: 10/6/2014
Difficulty Level: Intermediate
Time to Complete: 30 minutes?
Pricing: $5+ depending on materials and embellishments

Materials Needed:
- 2 1/4″ black ribbon
- 1/4″ black ribbon
- 3/8″ Halloween ribbon
- cardboard or plastic to create templates
- template to trace for hat circle and cone
- light colored pencil for marking black ribbon
- needle and black thread
- 1 3/4″ single prong salon clip aka alligator clip
- non-slip grip like Silly Grip
- hot glue gun
- lighter
- protective heat mat
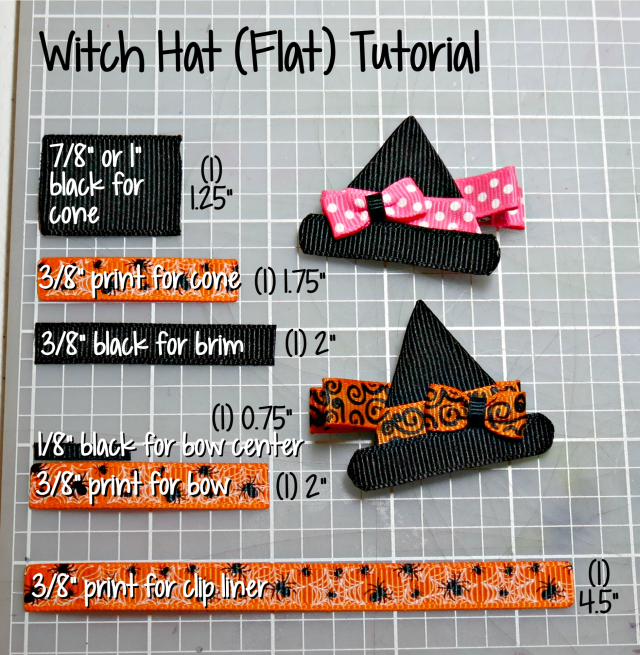
Measurements: (and what the pieces are for)
- 2 1/4″ of 2 1/4″ black ribbon for round hat bottom
- 3″ of 2 1/4″ black ribbon for hat cone
- 5″ of 3/8″ Halloween ribbon for bow, cut edges into V shape
- 3/4″ of 1/4″ black ribbon for bow center wrap
- 3 1/2″ of 3/8″ Halloween ribbon for hat wrap, cut edges at 30% slant up
- 4 1/2″ of 3/8″ Halloween ribbon for alligator clip liner
Instructions:
- These are very general instructions, so I hope to be posting a video with more detail as soon as I can.
- Trace templates for circle and cone onto the pieces of 2 1/4″ black ribbon using a white chalk pencil or light colored pencil so you can see where to cut it.
- Cut out circle and cone, and heat seal all edges.
- Wrap cone piece into cone shape and glue into place. (I’ll be making a video shortly showing how to do this, it is a little tricky.)
- Use scissors if necessary to even out bottom of hat so it will sit flat on the circle, just make sure there are no bumps.
- Starting in the back of the hat on the crease, glue the 3 1/2″ piece of Halloween ribbon to the hat with 1 dot. It will still be sticking out on both sides.
- 1 side at a time, add a little glue and adhere, wrapping it around to the front. It will not all go on, it will slant down, and you will cut off the excess afterwards.
- Cut off excess from wrap.
- As evenly and quickly as possible, line glue around the entire circular bottom of hat cone and then center and stick onto hat circle before it dries.
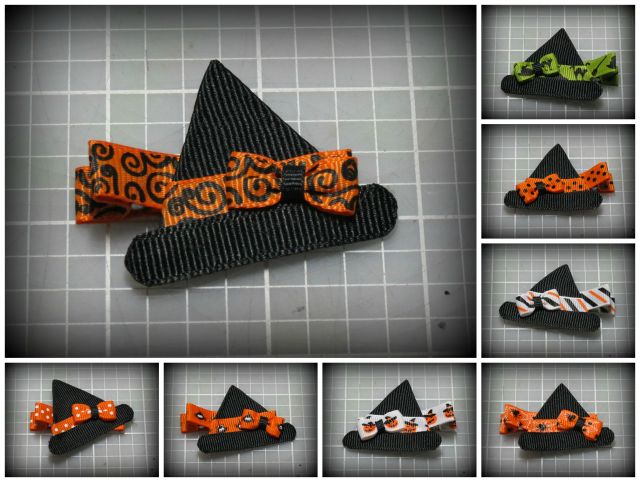
- Make bow, and glue onto center front of hat where points of hat wrap meet, thus covering that part up.
- Finally, determine which way your hat will face and glue onto a ribbon lined alligator clip.