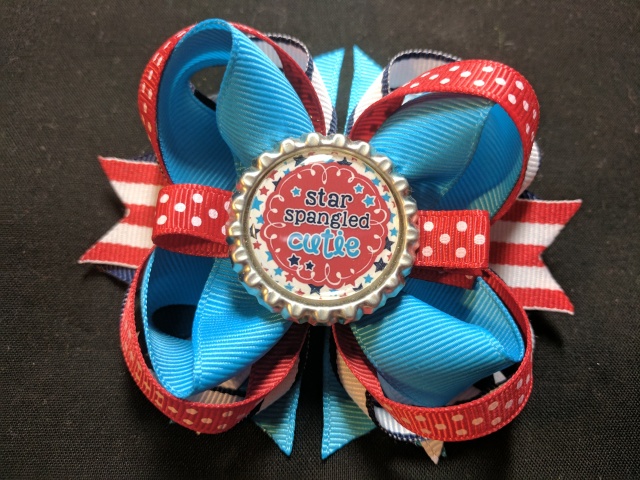
4th of July Over the Top Bow, “Star Spangled Cutie”

4th of July Over the Top Bow with “Star Spangled Cutie” removable/changeable bottle cap

Date Created: 7/2016
Difficulty Level: Advanced
Time to Complete: 30+ minutes
Pricing: $7.00
IMG_20170310_154815
Materials Needed:
  • 3/8″ ribbon
    • red with white dots
    • navy& white lollipop stripes
  • 7/8″ ribbon
    • turquoise
    • white
    • navy
    • red & white stripe
  • 50-60cm french clip
  • 1.75″ alligator clip
  • 1″ bottle cap image
  • 1″ epoxy dot
  • 1″ bottle cap
  • E6000 glue
  • scissors
  • needle and thread
  • hot glue gun
  • lighter or heat seal source
Measurements: (and what the pieces are for)
  • 16″ of 7/8″ turquoise for boutique bow
  • 5″ of 3/8″ red with white dots for center
  • 4.5″ of 3/8″ red with white dots for clip liner
  • 6″ of 3/8″ red with white dots for center wrap
  • (2) 9″ of 3/8″ red with white dots for top bow surround
  • (2) 9.5″ of 3/8″ white & navy lollipop stripes for bottom bow surround
  • Spikes (all 4″, but I think 4.5″ would have worked better on this bow)
    • (2) 7/8″ turquoise
    • (2) 7/8″ white
    • (2) 7/8″ navy
    • (1) 7/8″ red & white stripe
Note:
After making boutique bow, it measured 3″ from corner to corner. So to measure the spikes I added 1″ and cut them at 4″.  However, these spikes ended up a bit too short and didn’t stick out under the bow at all.  I would try measuring spikes to be 1.5″ longer than longest length of the boutique bow.
Instructions:
Sorry, no tutorial available yet for this one.  Please add a comment below if you’d like to request to see instructions on how to make this bow.

Popsicle Hair Clip

Popsicle Hair Clip for the 4th of July

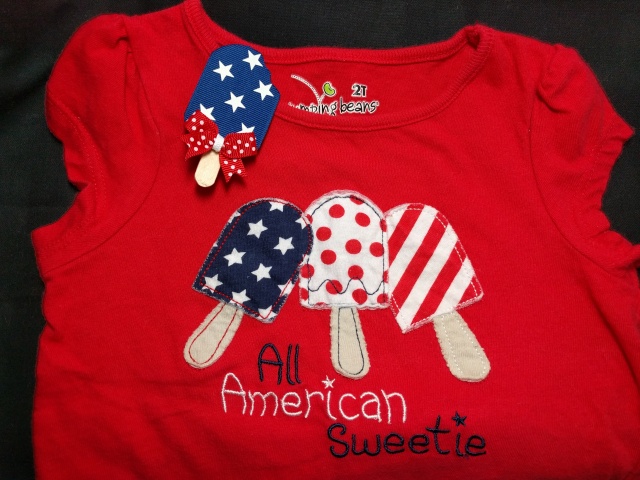
I had been wanting to make these all summer long and then finally she put on this shirt and I just had to make a popsicle bow to go with it for her.

IMG_20160702_143653.jpg

So I made 1 to match the shirt and then made 2 other pops with the 4th of July inspiration

img_20160702_144248

img_20160702_161356


Here’s the measurements I used to make them.

  • 2″ of 1 1/2″ blue with white stars grosgrain
  • 4 1/2″ of 3/8″ red with white polka dots grosgrain for mini decorative bow
  • 1″ 0f 1/8″ white for bow center of mini decorative bow
  • 4 1/2″ of 3/8″ grosgrain for ribbon lined hair clip
  • 1/2″ of a  popsicle stick, score halfway with blade and then snap in half

img_20160702_143724

Here’s most of how I did it.  I left out details on repetitive bow making steps, but you can probably find tutorials on how to do those steps in my other blog posts.

  1. Cut rounded corners on blue with white stars ribbon. Cut the top corner a bit deeper in than on the bottom curves and then cut a “bite” shape into other top corner.  Use a lighter or candle as you seal it to adjust the shape of the “bite” to your liking.
  2. I cut felt for backing the popsicle to help hold it a bit more rigid so it wasn’t flopping around.  I got some very thin sturdier than normal, felt in a double sized sheet at the Hobby Lobby and that worked perfectly.  I cut it in about 1/4″ from all edges.  Adhere with hot glue.
  3. Line clip with a color similar to the popsicle stick, i used peach, it was the closest I had.
  4. Next, decide how long you want your stick to stick out the bottom and glue popsicle stick to pop.
  5. Be sure to line the clip (what I consider backwards) so that long flat side of the clip is fully lined with ribbon and bent side of clip is closer to the head.  Then glue ribbon lined clip to the back of the popsicle stick.
  6. Finally, make a mini decorative bow and add that to the front.  You don’t have to have that bow, but I think they look way cuter that way.

Wear the bow alone, or clip onto another bigger bow 🙂

img_20160703_152105